We are professional manufacturer and vendor of different kinds of private label lashes: eyelash extensions, russian lashes, mink eyelashes, 3D Lashes & Eyelashes Tools since 2002
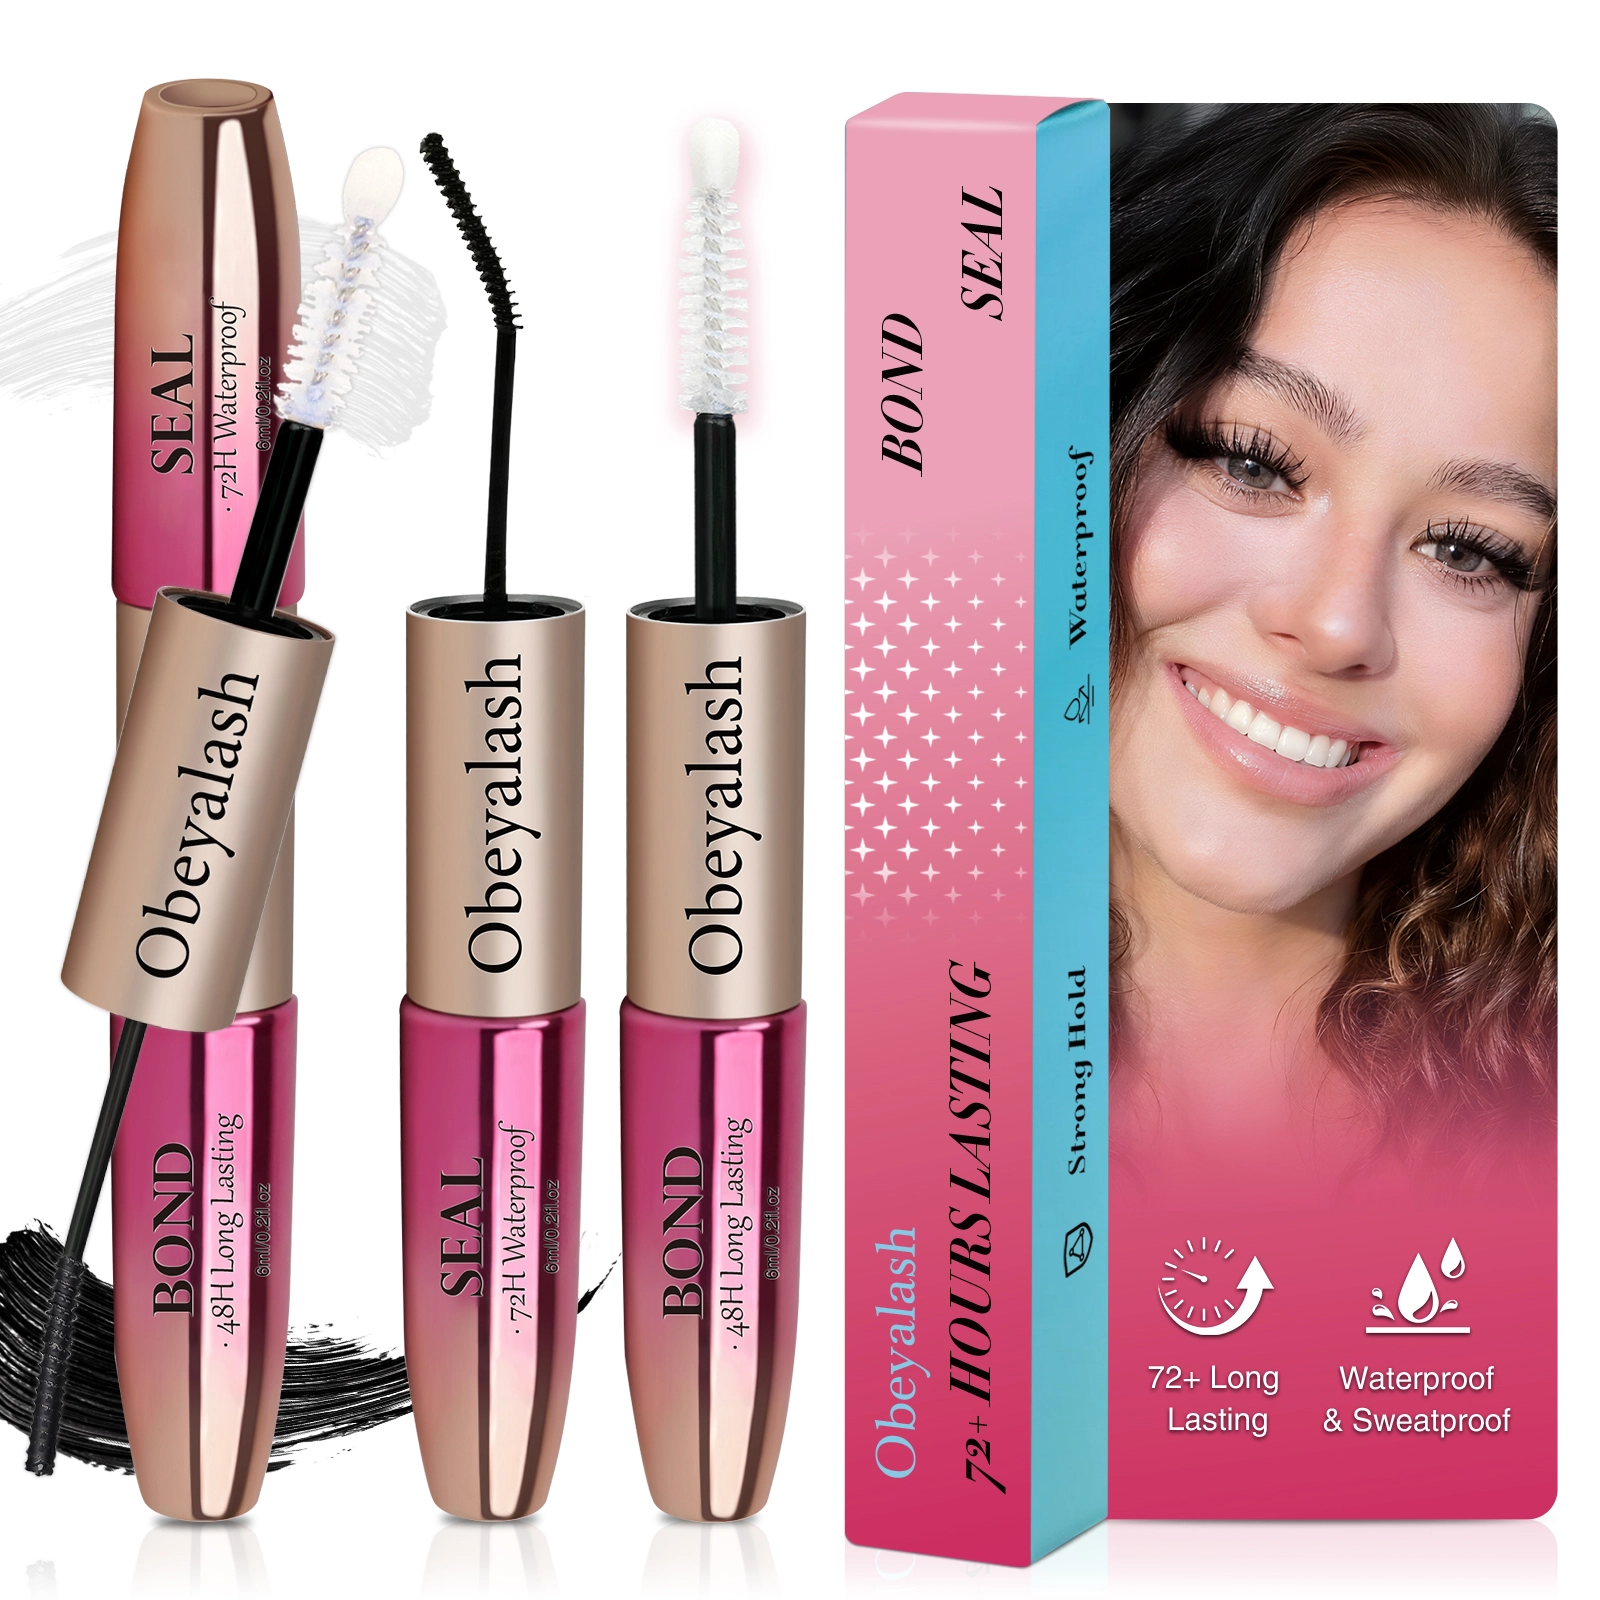
Cluster Lashes Bond and Seallash glue long lastingfalseeyelashes glue extra strongclear bond and seal for cluster lashes
902695.webp "lash bond and seal (5)902695.webp")
Eyelash extensions have become an essential part of modern beauty routines, helping people achieve glamorous, eye-catching looks with minimal effort. While professional salon extensions can be costly and time-consuming, DIY cluster lashes have quickly grown in popularity because they allow anyone to create customizable lash styles in the comfort of their home.
The key to making cluster lashes last—and look as natural as possible—lies in using bond and seal. These two products work together to attach lash clusters securely, protect them from external factors, and make them comfortable to wear for days. But for many beginners, the question remains: What exactly are bond and seal? Why should I use white bond and clear seal? And how do I apply them correctly?
This guide will answer these questions in detail, helping you master the use of bond and seal so you can achieve long-lasting, beautiful DIY lash extensions.
What is Cluster Eyelash Bond and Seal?
To understand bond and seal, think of them as a two-step system: one product to stick the lashes on, and another to lock everything in place.
1.Bond (Eyelash Glue)
The bond is a lash adhesive designed specifically for individual or cluster lashes. Unlike strip lash glue (which is applied along the lash band), cluster lash bond is applied directly to your natural lashes at the base.
Most bonds come with a micro mascara-like brush that allows you to coat your lashes evenly and precisely.
Its formula is designed to be lightweight yet strong, so it doesn’t weigh down your lashes or cause discomfort.
2.Seal (Top Coat / Protective Layer)
After applying bond and lash clusters, the seal comes in as the finishing step.
It locks the lashes in place, prevents them from shifting, and removes any sticky residue.
The seal also creates a thin protective barrier against moisture, oils, and dust, extending the wear time of your clusters up to 72 hours or more.
In short: Bond attaches the lashes, while seal protects them—making the two products inseparable for a successful DIY lash extension look.
362894.webp "cluster lash glue (1)362894.webp")
The Advantages of White Bond and Clear Seal
There are different types of bond and seal formulas available (such as black, transparent, or colored adhesives), but white bond + clear seal is one of the most user-friendly and effective combinations.
1. Advantages of White Bond
Beginner-friendly visibility: The white color makes it easy to see exactly where you’re applying the glue, reducing mistakes.
Dries clear: Once it sets, it turns invisible, blending seamlessly with your natural lashes.
Gentle formula: White bonds are often made with safer, hypoallergenic ingredients, making them suitable for people with sensitive eyes.
Precision control: With its smooth consistency, it spreads evenly without clumping.
2. Advantages of Clear Seal
Invisible finish: The clear formula doesn’t interfere with eye makeup or the natural look of your lashes.
Prevents stickiness: One common issue with lash glue is tackiness—clear seal eliminates this by smoothing the lash surface.
Extended wear: It locks the adhesive, helping clusters last much longer (up to 72 hours).
Comfort: Reduces lash stiffness or heaviness, ensuring lashes feel lightweight and natural.
3. Why the Combination Works Best
Using white bond and clear seal together provides the best of both worlds:
White bond makes application foolproof and neat.
Clear seal guarantees a flawless, long-lasting, natural finish.
391062.webp "cluster lash glue (2)391062.webp")
How to Use Bond and Seal?
Getting beautiful, long-lasting cluster lashes isn’t difficult, but it does require the right technique. Here’s a detailed step-by-step process to help you master bond and seal application.
Step 1: Prepare Your Natural Lashes
Wash your face and ensure your lashes are free of makeup, oil, or mascara.
Use an oil-free lash cleanser or micellar water to clean the lash line.
Dry your lashes completely before application—moisture can weaken the bond.
Step 2: Apply the Bond
Using the white bond brush applicator, lightly coat your natural lashes near the root (not the skin).
Apply a thin layer only—too much glue can cause clumping and discomfort.
Wait 10–15 seconds until the bond becomes tacky.
Step 3: Place the Lash Clusters
With tweezers, pick up a lash cluster and place it underneath your natural lashes, close to the lash line.
Press gently to secure it in place.
Repeat from outer to inner corners, adjusting the number of clusters based on the look you want (natural, wispy, or dramatic).
After applying all clusters, gently press them together with tweezers or your fingers to merge with your natural lashes.
Step 4: Apply the Seal
Using the clear seal brush, apply a thin layer at the base of your lashes where the bond was applied.
Avoid brushing too high up, as this may make the clusters stiff.
Let the seal dry naturally—it will remove any stickiness and lock the lashes in place.
Step 5: Maintain Your Cluster Lashes
Avoid rubbing your eyes or pulling on your lashes.
Stay away from oil-based skincare or makeup removers, as oil can break down the adhesive.
Sleep on your back if possible to prevent friction against your pillow.
Step 6: Safe Removal
Never pull cluster lashes off directly.
Use a professional lash remover or oil-based cleanser to gently dissolve the bond.
After removal, clean and brush your natural lashes to keep them healthy.
124329.webp "cluster lash glue (6)124329.webp")
Common Mistakes to Avoid
Even with the right products, some mistakes can ruin your lash look. Here’s what to watch out for:
Applying too much bond: This causes clumping and makes lashes look unnatural. Always use a thin layer.
Placing clusters on the skin: Bond should attach to your lashes, not your eyelid, to avoid irritation.
Skipping the seal: Without sealing, the lashes may not last as long and can feel sticky.
Using oil-based removers or creams near lashes: Oils break down adhesive and shorten lash wear.
Sleeping face-down: Friction can dislodge clusters overnight.
Extra Tips for the Best Results
Choose the right clusters: Use lightweight PBT fiber cluster lashes for a comfortable feel.
Customize your look: Mix different lengths and curl styles for a natural or dramatic effect.
Practice makes perfect: Your first try might not be perfect, but with practice, you’ll achieve salon-quality results in minutes.
Use a lash applicator tool: This helps press the clusters firmly without damaging your natural lashes.
Conclusion
Using bond and seal for cluster eyelashes is the secret to achieving flawless, salon-style lash extensions at home. With white bond, you get an easy-to-apply adhesive that dries invisible and gentle on the eyes. With clear seal, you lock in the clusters, extend wear, and keep lashes comfortable and natural-looking.
By preparing your natural lashes properly, applying bond carefully, placing clusters strategically, and sealing them in place, you can enjoy beautiful
DIY lashes that last for days. Avoiding common mistakes and following aftercare tips will ensure not only long-lasting wear but also the health of your natural lashes.
Whether you want a soft, natural look for everyday wear or bold, dramatic lashes for special occasions, mastering the use of bond and seal gives you the freedom to customize your beauty—anytime, anywhere.
You May Interested:
https://obeyalashes.com/New-Double-End-Lash-Bond-And-Seal-Special-For-DIY-Cluster-Lashes-LM_355.html
534.webp)
Designed for professional lash artists, this multifunctional lash tape is perfec...
More >>560.webp)
Designed for professional performance, these reusable lash lift shields offer su...
More >>950.webp)
This dual-ended Bond & Seal lash adhesive combines powerful grip with protective...
More >>553.webp)
Achieve effortless beauty with no-glue-needed press-on lower lashes. This versat...
More >>713.webp)
Say goodbye to messy glue—our Press On Lashes give you flawless eyes in seconds....
More >> (1)183.webp)
Create the perfect soft yet striking eye look with our brown spike lash extensio...
More >> (1)800.webp)
Obeyalashes Hot Selling Foxy Eye Look False Eyelashes are designed to create a l...
More >>